The devices listed below have differing management options when selected in a Device table. Click on the following links for device-specific information:
TesiraFORTÉ X and Devio SCX Devices
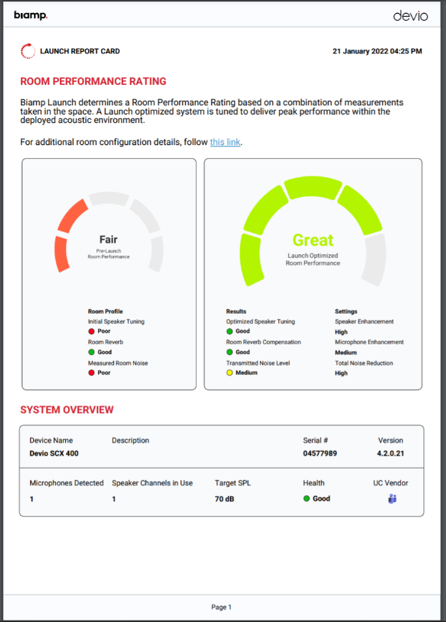
Under the Manage Device, Audio Tab, the "Launch" button initiates the Biamp Launch automated system configuration process.
The Report Card and Advanced Report can be accessed after Launch has run successfully. When clicked on, the report opens up in a new web browser tab.
From the Managing Devices page, a user may access the following tabs for Tesira devices:
![]()
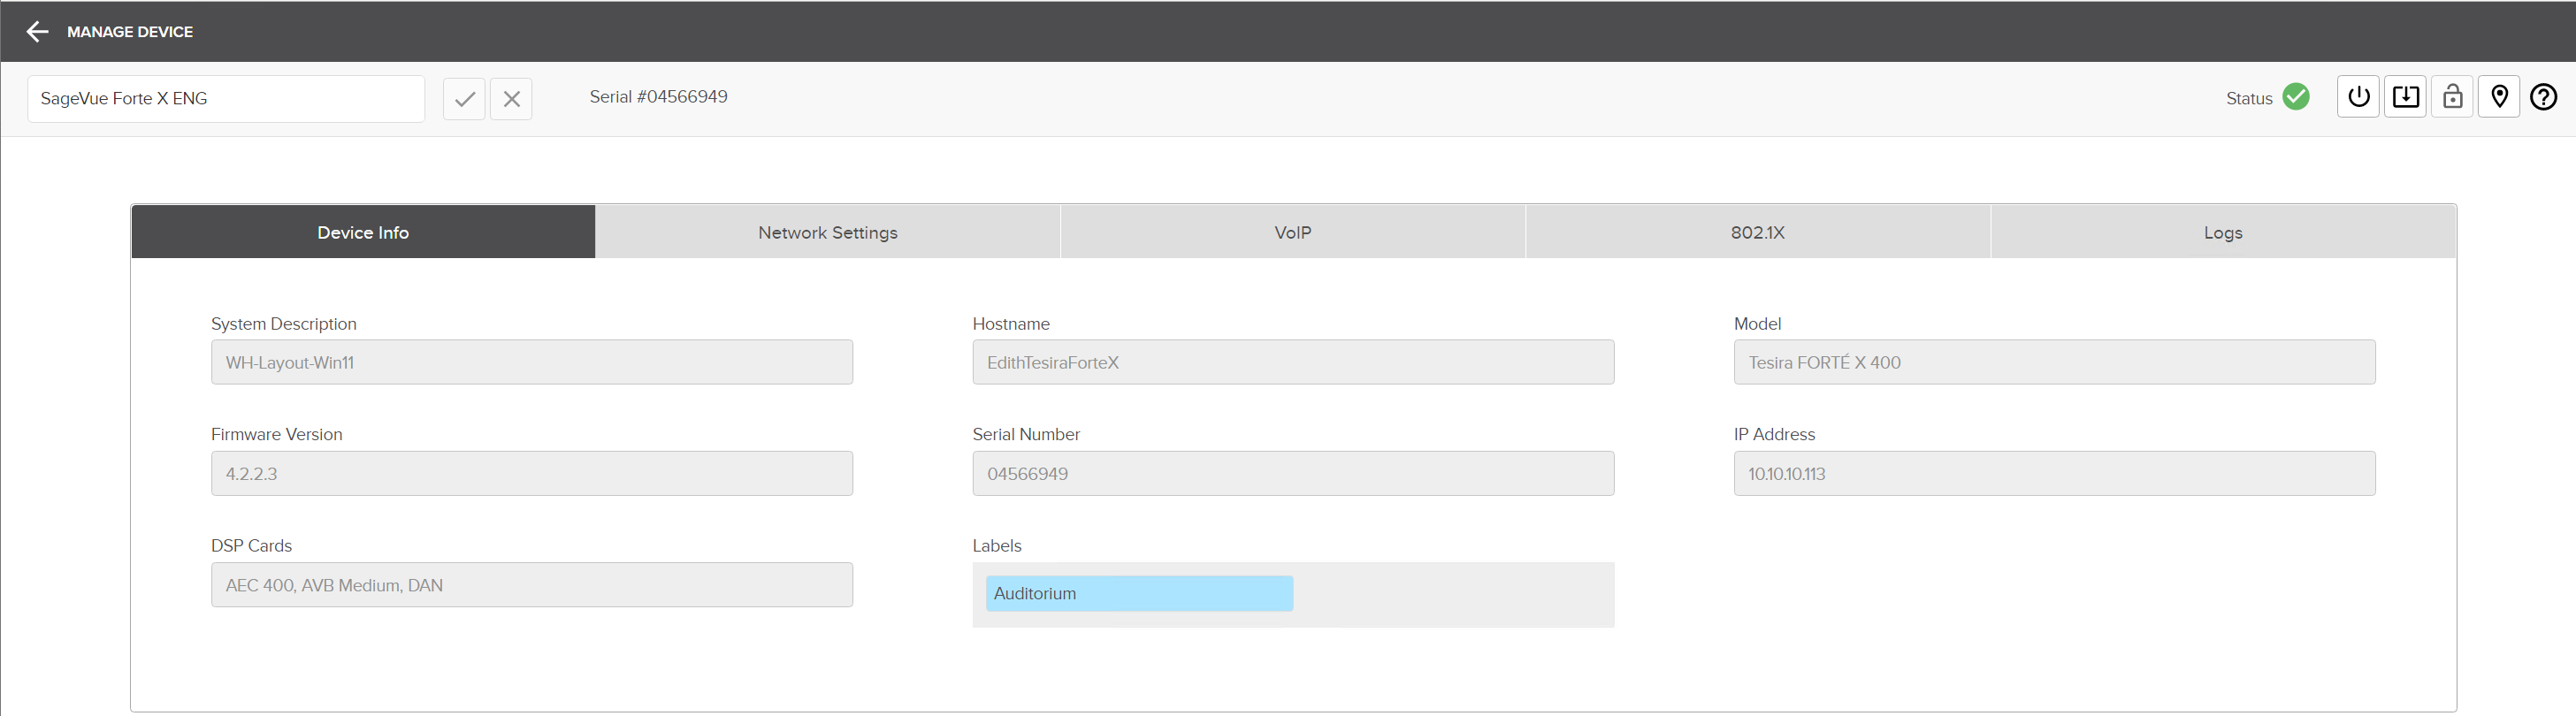
The device name may be changed in the upper left-hand part of the screen by clicking the Edit button.
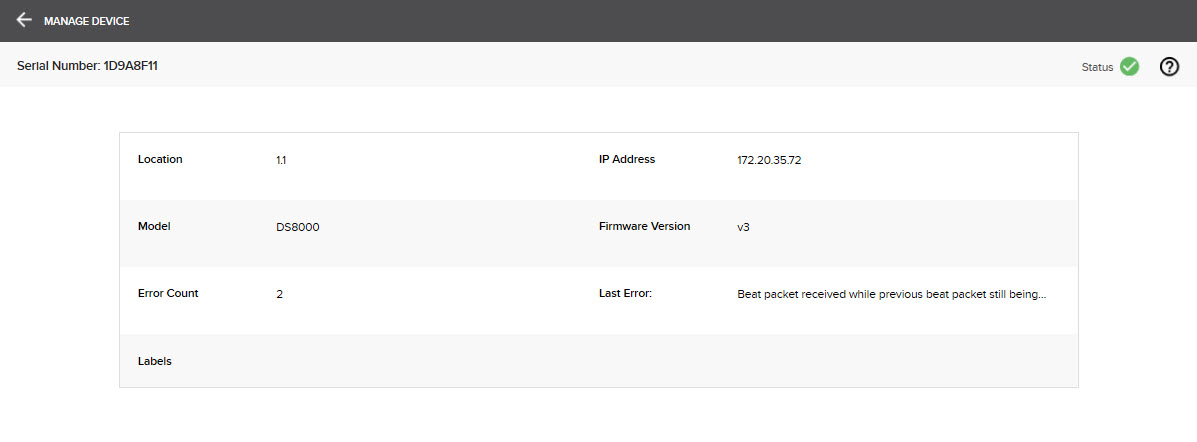
Status icons give the following information:
![]() Alarm - the system/device was not found or a major fault is present.
Alarm - the system/device was not found or a major fault is present.
![]() OK- the system/device is found on the network and no active faults or errors are present.
OK- the system/device is found on the network and no active faults or errors are present.
![]() Action Required - the system/device was discovered on the network but a fault has occurred on a device or a device was not found.
Action Required - the system/device was discovered on the network but a fault has occurred on a device or a device was not found.
NOTE: Hovering over a status icon will provide a tool tip with information on the status of a System or Device.
To reboot a device, click the ![]() Power button in the upper right corner of the screen. A dialog will give the user information as to whether the reboot was successful or not.
Power button in the upper right corner of the screen. A dialog will give the user information as to whether the reboot was successful or not.
 To update firmware on systems and devices, click the firmware convenience button in the upper-right corner of the screen.
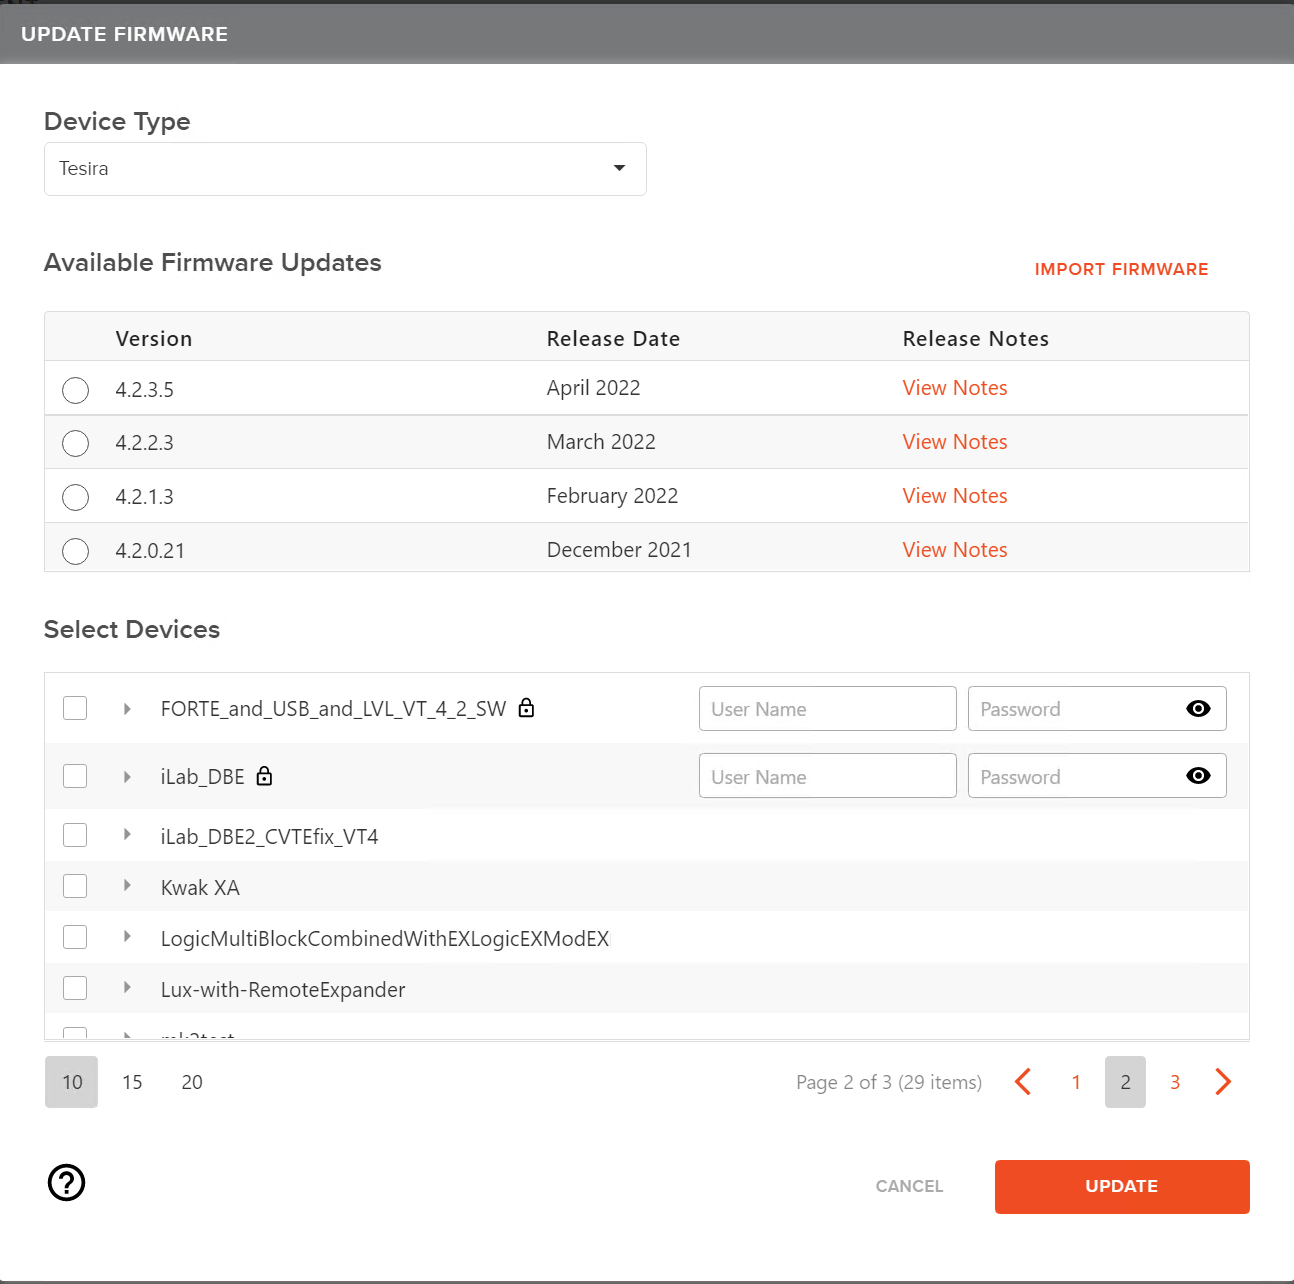
Update Settings Note: SageVue automatically downloads the latest available firmware based on the Update parameters set in the SageVue Settings menu. When a device type is selected, all available firmware versions downloaded are displayed. Pertinent release notes may be accessed prior to the updating by clicking the View Notes link.
 Updating Firmware
To update:
Information on successful updates and any errors is provided in a dialog following process completion.
Systems may be locked to prevent changes or to allow access to only designated users.
![]() System locked
System locked ![]() System unlocked
System unlocked
Users may unlock a system by clicking on the locked icon and entering a valid username and password. These credentials are not stored in the gateway. Entering these credentials causes the system design software to SageVue access to the gateway. If the credentials are changed or the system design software is reset, the user will not be able to unlock the system without entering updated credentials.
 Click the Locate button to initiate a device's locate function.
For TesiraXEL amplifiers, a popup will allow users to adjust locate volume level:
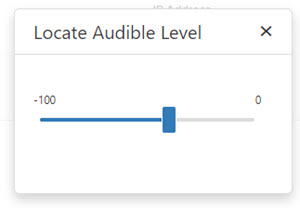
Credentials are required to activate Locate on protected systems.
 If the device selected is part of a SageVue-controlled system or if it was part of a SageVue-controlled system that was cleared, the Protect icon will be replaced with the SageVue Control icon.
The SageVue Control icon will be visible but disabled if the selected device is part of a system actively under SageVue Control. Releasing the SageVue-controlled system will also release the device(s) in that system from SageVue control.
If a system has been cleared but was still under SageVue control at the time, all devices in that system will still be under SageVue control. In this case, the SageVue control icon will be enabled and the device may be released from SageVue control. Click the SageVue icon and follow the prompts to release the device from SageVue control.
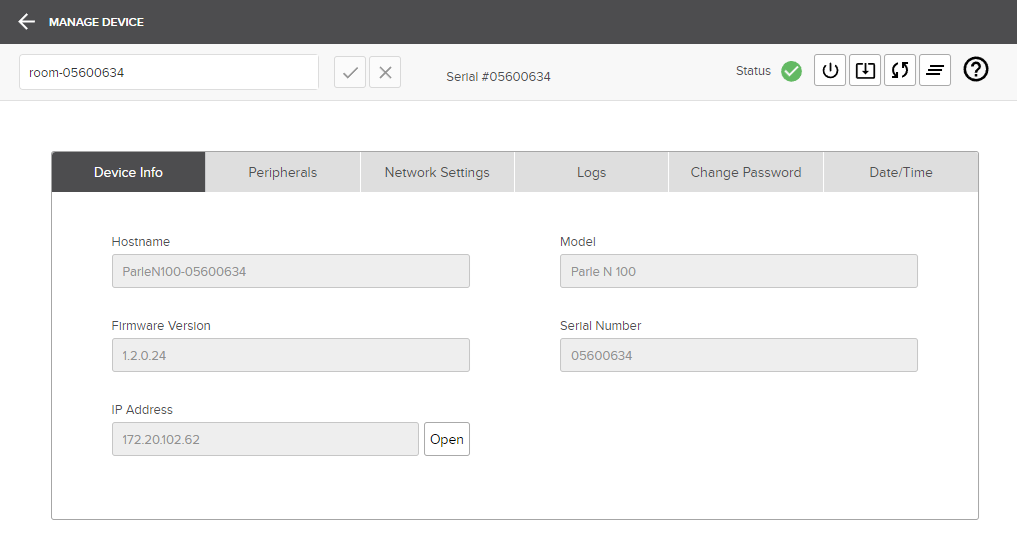
The Device Info tab is read-only and provides detailed information about individual devices.
The Network Settings tab allows authorized users to configure the following network settings for the device:
The Hostname is read-only.
Click UPDATE to make any changes or CANCEL to retain the current settings.
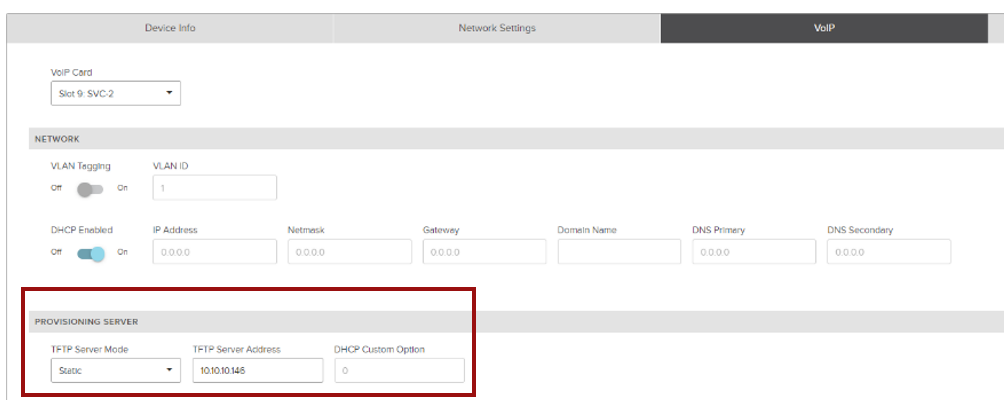
The VoIP Configuration tab allows authorized users to configure settings for a selected VoIP card. These settings are editable and reproduced from the VoIP Control Status control dialog in the system design software. There are VoIP card settings and Line-based settings.
VoIP Card Settings:
Provisioning Server:
Line-based Settings:
Proxy Vendor
Proxy Address
Proxy Port
SIP Domain Name
SIP user Name
SIP Display Name
Authentication User Name
Authentication Password
Click UPDATE to make any changes or Cancel to retain the current settings.
SageVue supports managing and configuring IEEE 802.1X for port-based Network Access Control (PNAC), which is an authentication mechanism for devices to attach to the Local Area Network (LAN). Only devices that support 802.1X will be configurable from this tab.
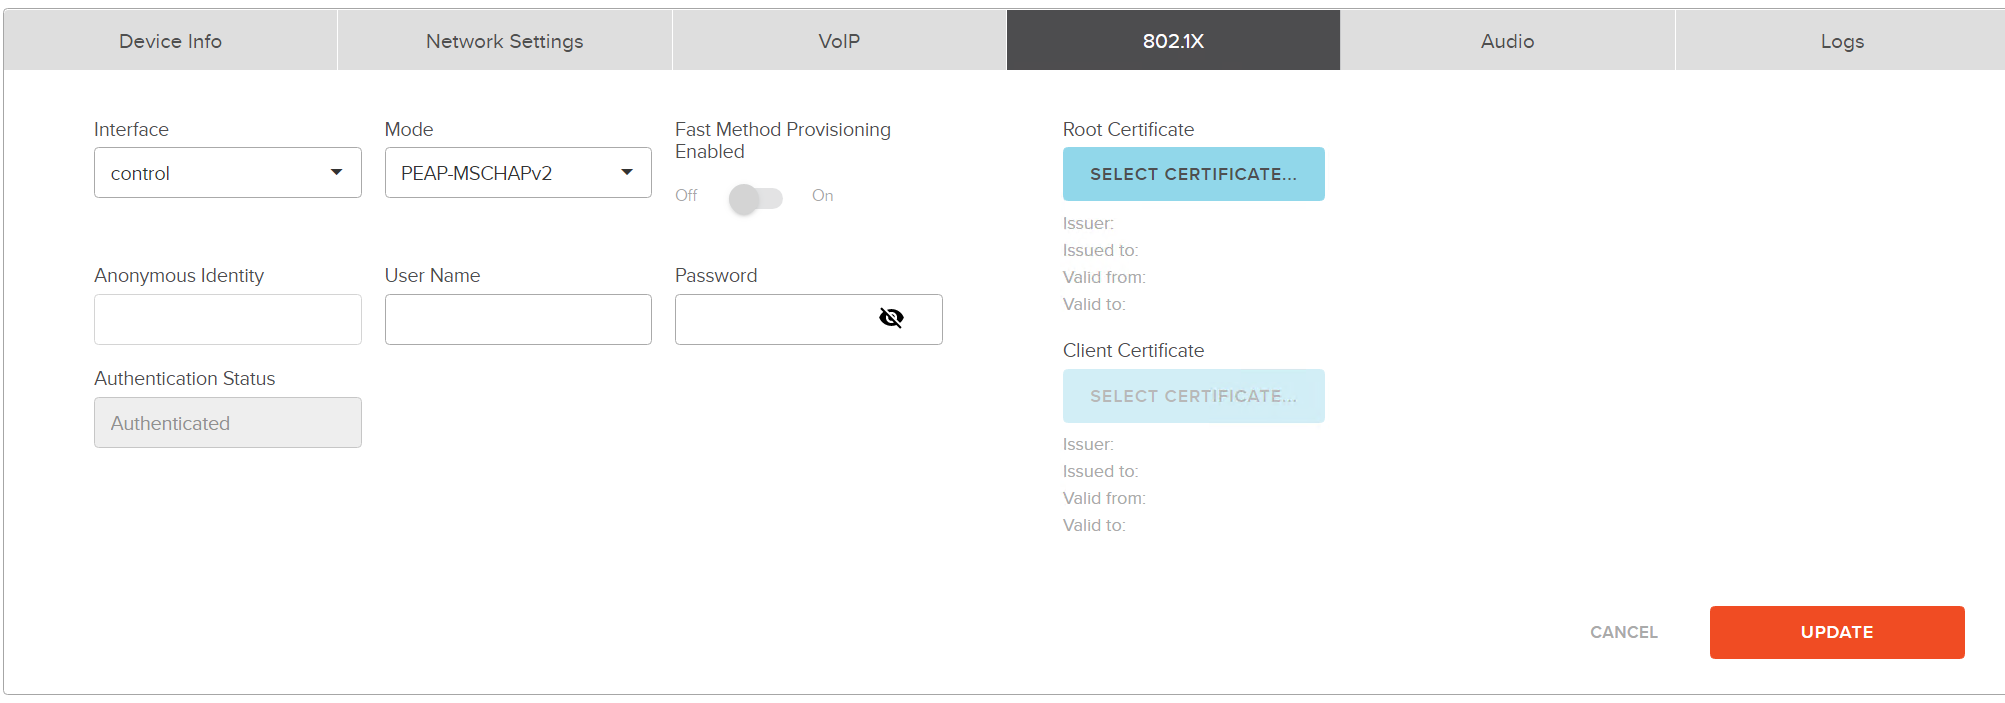
The 802.1X tab has the following user-defined options:
Interface - Allows the users to select between a Control or VoIP interface.
Mode - Defines the Extensible Authentication Protocol (EAP) mode to be used to authenticate certificates. The following options are available:
| MODE | DESCRIPTION |
| Disabled | Default setting |
| EAP-MD5 | Challenge-based password |
| EAP-TLS | Certificate-based two-way authentication |
| EAP-PEAP/MSCHAPv2 | Server authentication via certificate; client authentication via another EAP method |
| EAP-FAST | Certificate-based two-way authentication |
| EAP-TTLS/EAP-MSCHAPv2 | Optional server authentication via certificate; client authentication via another EAP method |
EAP-FAST Method Provisioning Mode - This can only be enabled when Mode is set to FAST:
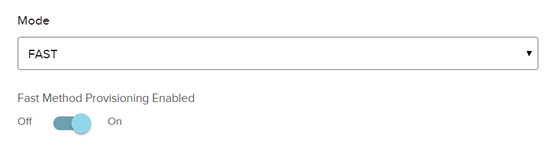
If the Mode is set to anything other than FAST, this button will be disabled.
Anonymous Identity - Optional
Text box is only enabled when Mode is set to EAP-FAST or EAP-TTLS/EAP-MSCHAPv2.
Field is not required to be populated.
Identity & Password - Disabled when Mode is disabled. Password field is not required when Mode is set to EAP-TLS.
Root Certificates - The user may upload a root certificate by clicking the  button. Uploading a Root certificate is not available if Mode is disabled or set to one of the following:
EAP-MD5
EAP-FAST and EAP-FAST Provisioning Mode set to "Unauthorized Provisioning"
NOTE: Root certificate formats must be either .pem or .der and is limited to a file size of 10K (10240 bytes).
After uploading a certificate, the following information will be shown when a valid certificate is imported:
Issuer
Issued to
Valid until
Client Certificates - Client certificates are only required when mode is set to EAP-TLS. The user may upload a client certificate by clicking the button. The following information will be shown when a valid certificate is imported:
Issuer
Issued to
Valid until
NOTE: Client Certificate format must be .pem. and is limited to a size of 10K (10240 bytes).
For authentication methods that require this certificate, the Identity (Username) must match the text next to "Issued to:" in the field under the Client Certificate Upload button, the format being the domain name followed by the username separated by a backslash (domainname/jjadmin to reference the image shown below). Note that the domain and username are provided as examples only; in order for a device to authenticate on the server, a valid username must be entered that exists on the authentication server and the user must also know the valid domain.
The Select Certificate button is only enabled when a certificate is required by the Mode selected.
Click UPDATE to enable changes or CANCEL to abort the operation.
Authentication Status - This field shows the authentication status of the 802.1X connection.
Troubleshooting - If a certificate fails to upload or validate, consider the following potential issues:
The file uploaded is empty
The certificate file has exceeded the maximum size limit of 10k (10240 bytes)
The uploaded Root certificate has failed validation; make sure the file has a certificate section and no private key
The uploaded Client certificate has failed validation; make sure the file has a certificate section and does have a private key
The certificate is expired or not yet valid
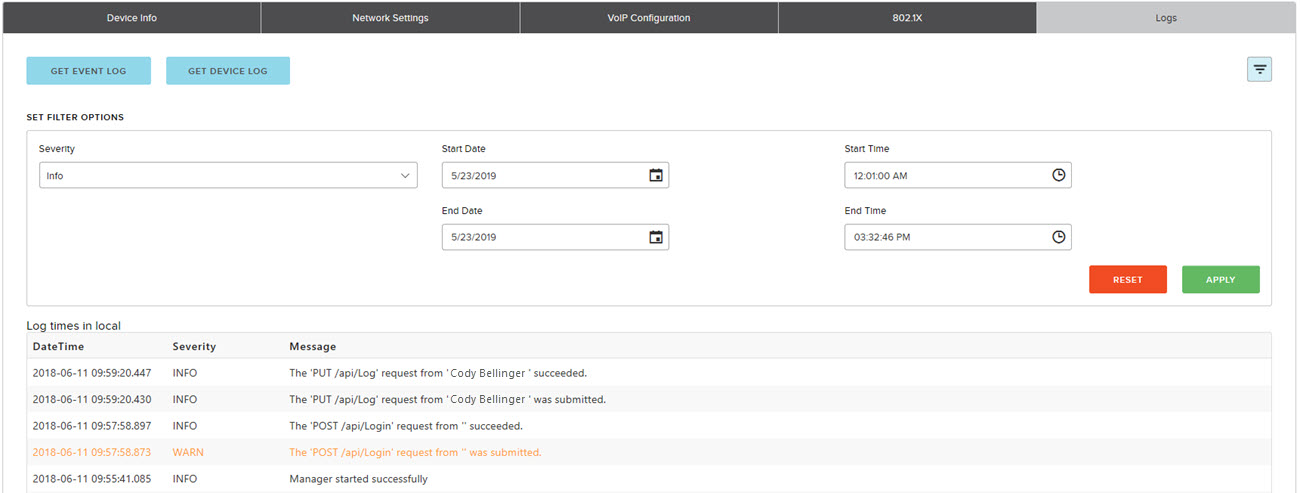
The Logs tab shows a record of events for each device. The log will consist of events such as system faults, errors and recent firmware updates. The severity of each event is given along with the date, time and a brief message describing the event. Logs may be viewed and filtered based on the user's preference.
To download logs directly to a computer click on one of the following:

![]()
To retrieve "user-level" logs from a device.
The initial display will show logged events for the current day only. To view events prior to the current day, users will have to filter logs using the  button. This also allows user search for events using a number of different filters.
The dialog below shows the filtering options and how results are displayed. To return to the primary Log tab, click Cancel. Filtering of events begins as soon as a user starts entering information. To clear all filters, click Reset.
When an EasyConnect or Parlé device is selected, a user may access each of the following tabs:
![]()
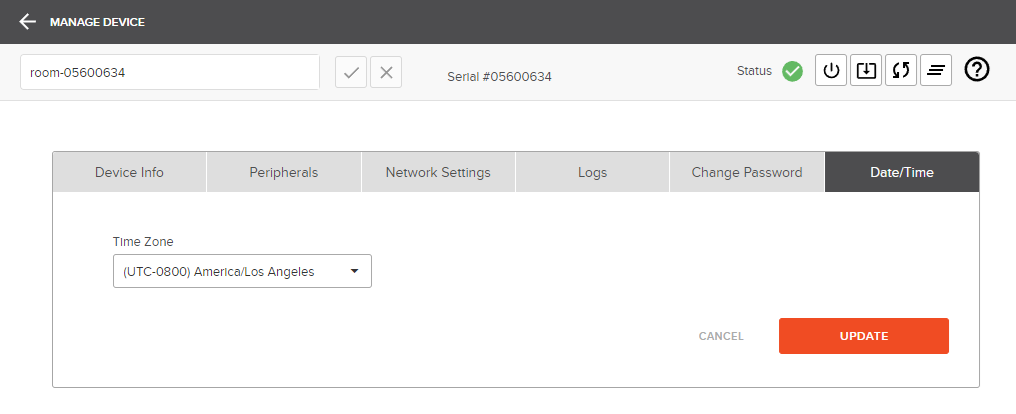
Note: The room name, in the upper left, can be changed while any tab is selected (if it is not protected) and it will be applied to the device and reflected in each tab. the default name is "room" followed by the device serial number. The naming requirements are as follows:
The Devio page gives information about the Devio device selected.

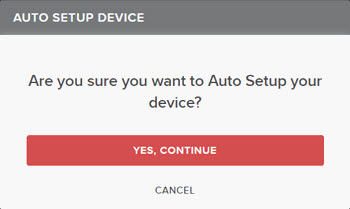
Click the ![]() icon to initiate Auto Setup. Users will be presented with a dialog to verify they wish to continue:
icon to initiate Auto Setup. Users will be presented with a dialog to verify they wish to continue:
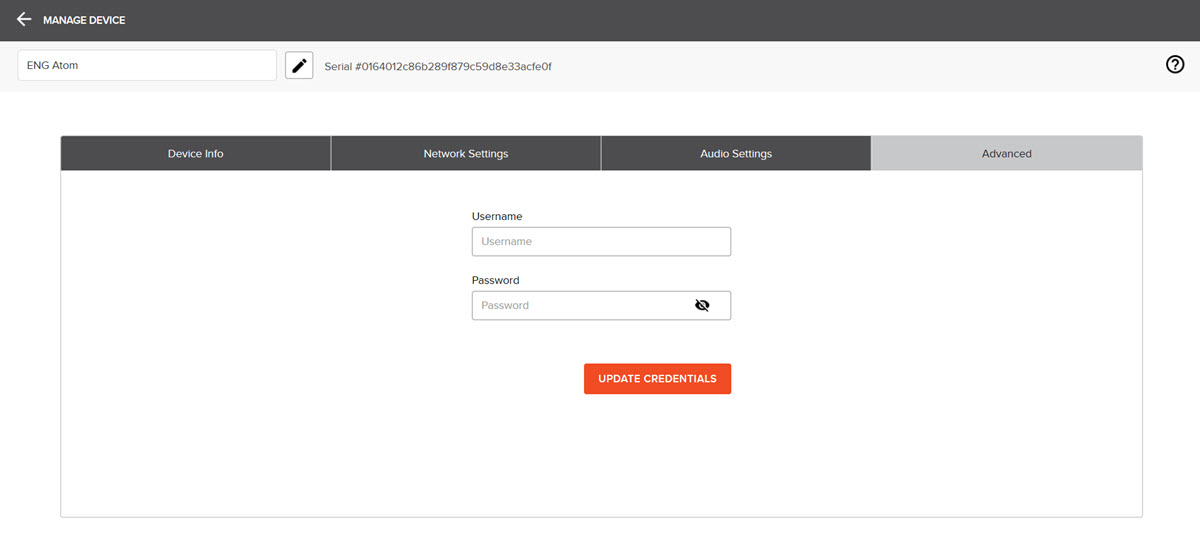
When a CrowdMics (ATOM) device is selected, a user may access the following tabs:
Depending on the type of Cambridge Sound Management device selected, a user may access different tabs.
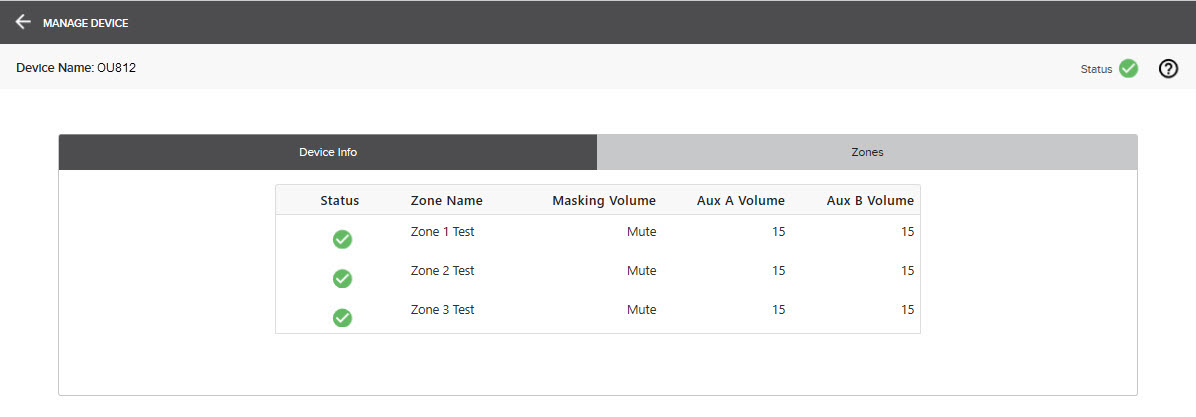
The Device Info tab gives general information about the device. Information on this tab is read-only unless otherwise specified.
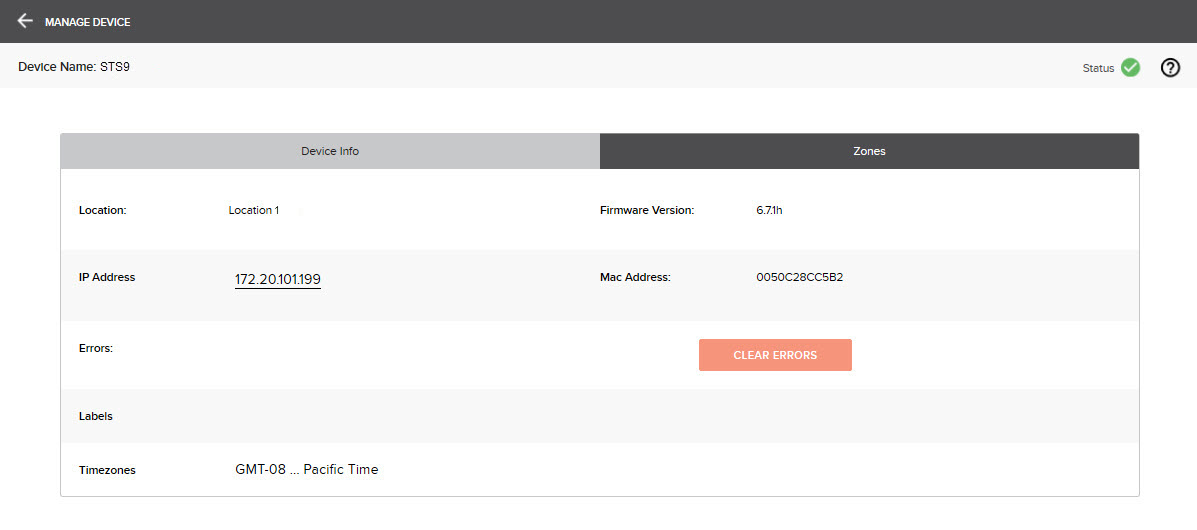
The Zones tab gives information about zone settings for the selected device, to include the zone name, masking volume level Aux volume levels. This information is read-only.
The Dynasound device page gives read-only information: